 Brian D. Wendt
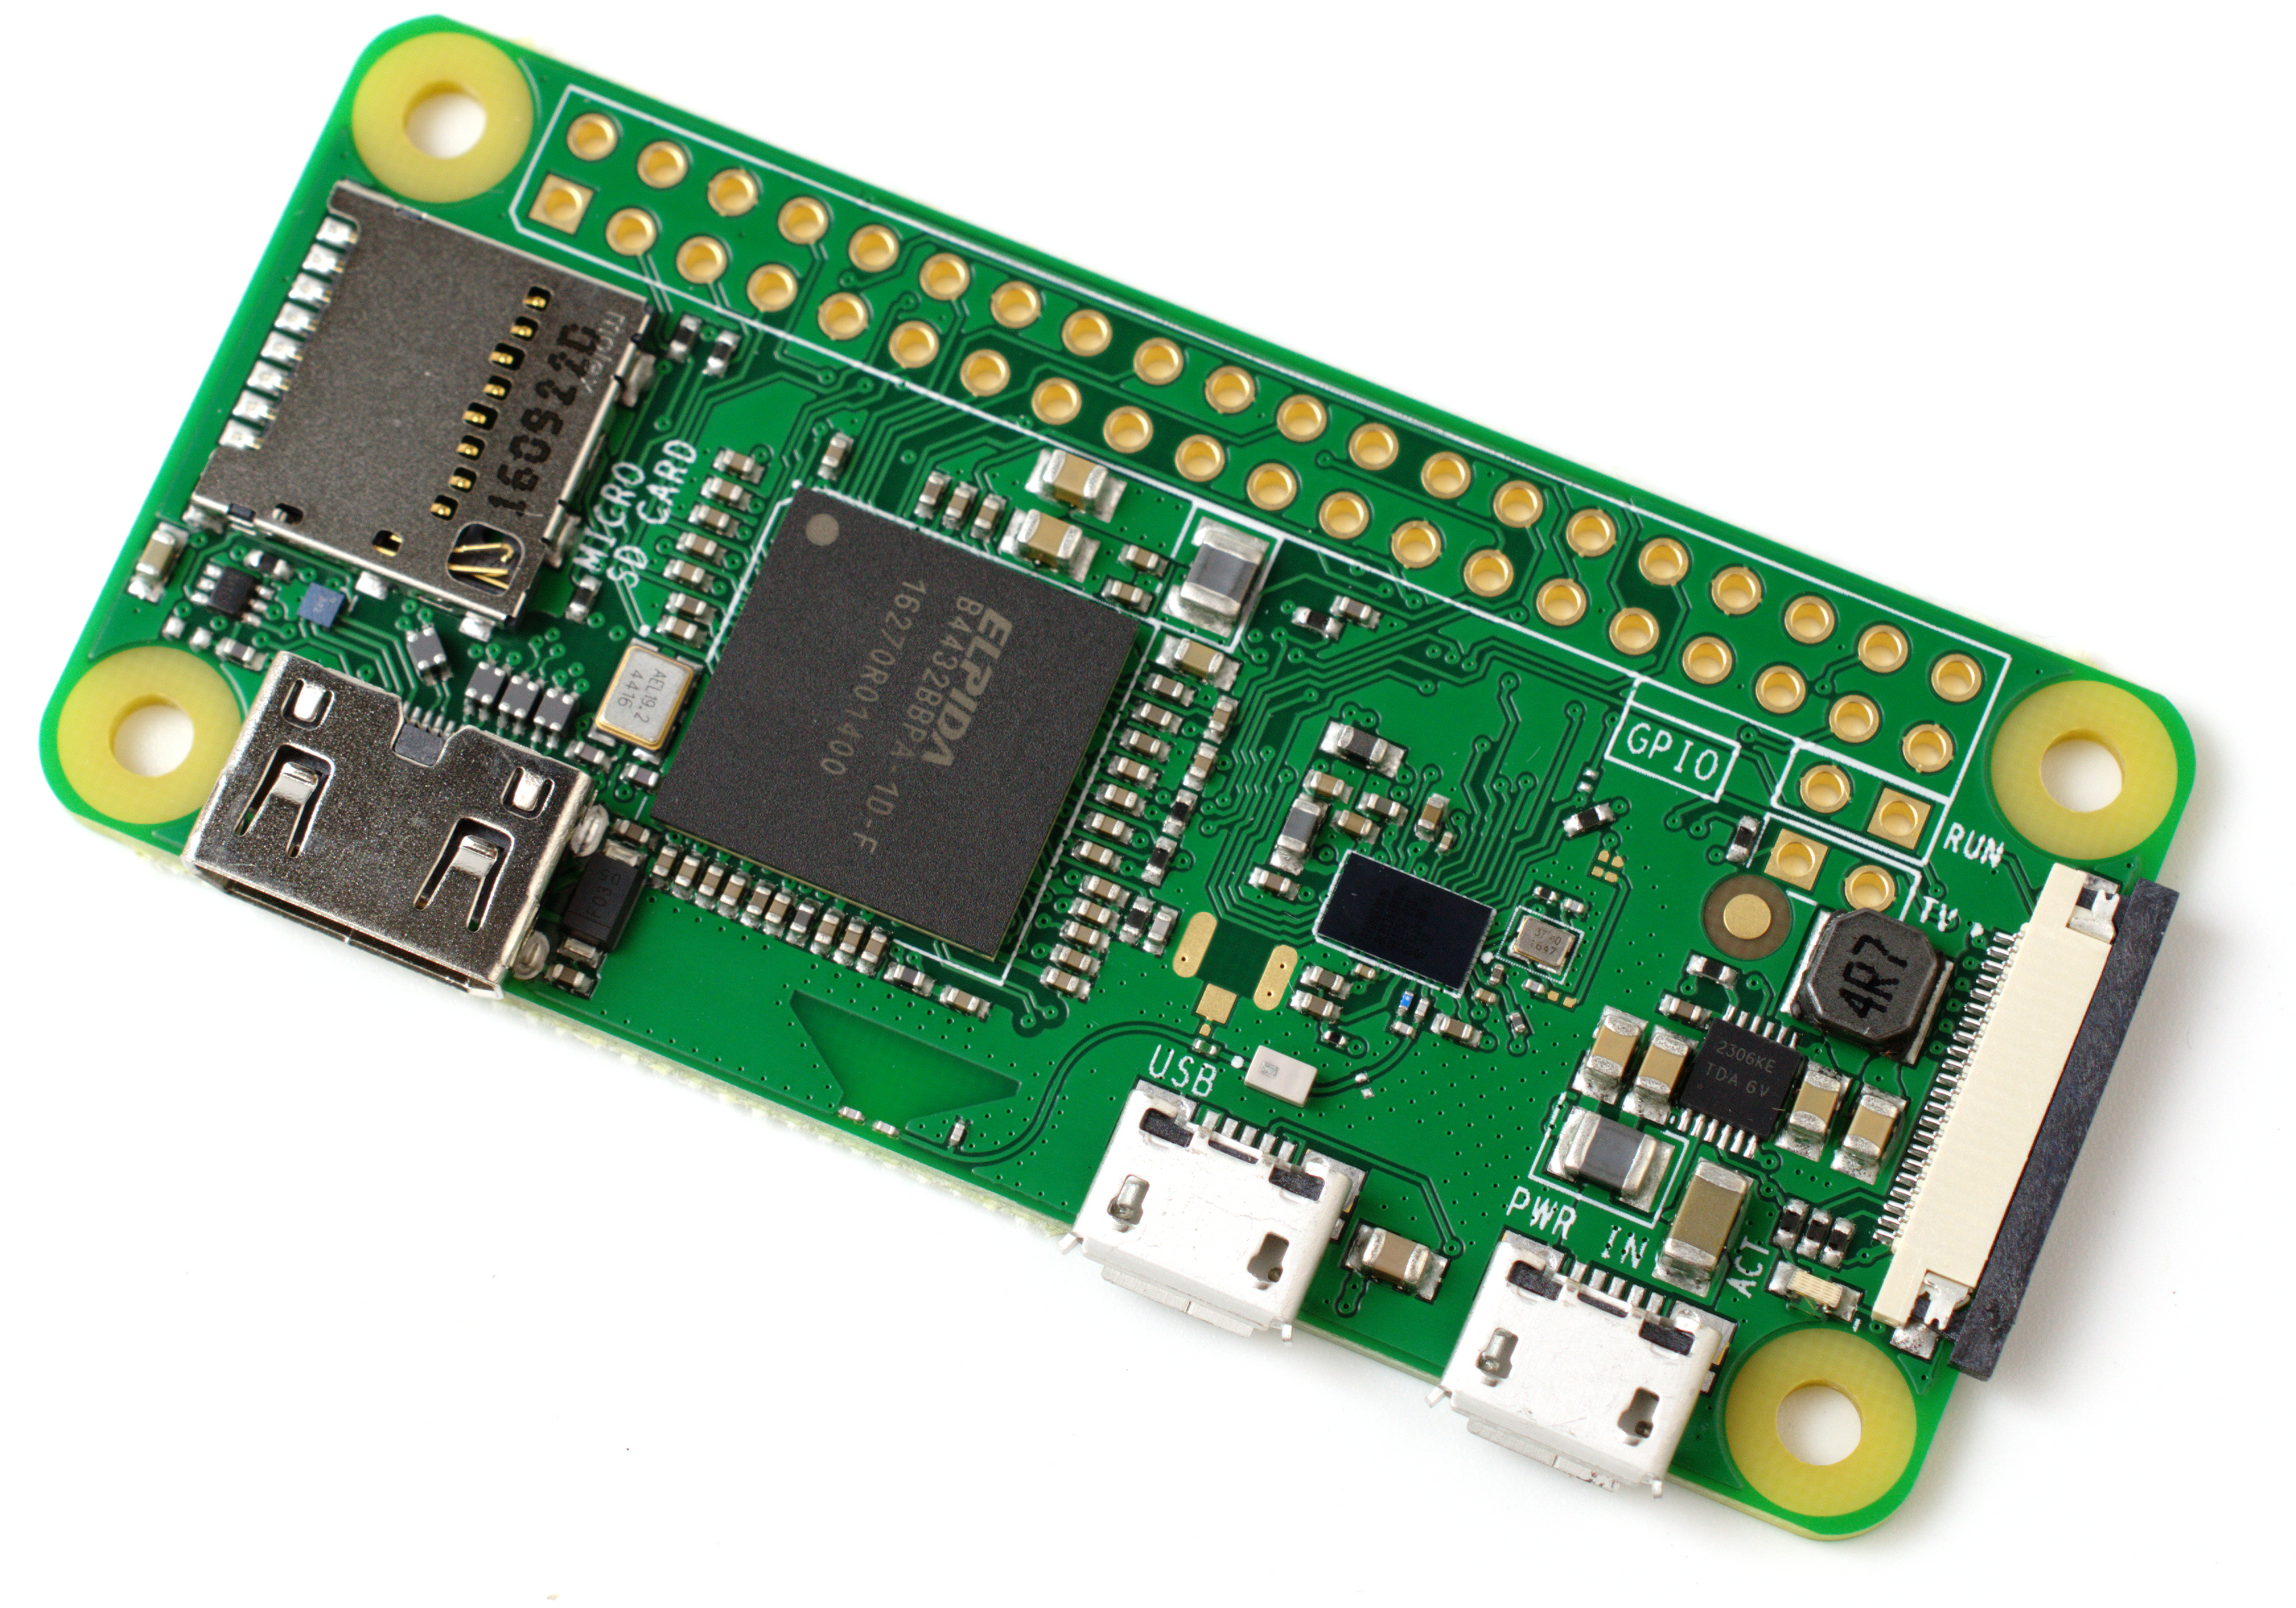
The Raspberry Pi Zero W is the smallest standalone RPi board, and includes built-in WiFi and Bluetooth connectivity. It has the same 40-pin GPIO pinout as the full-featured Raspberry Pi 4, but without the male headers soldered onto the board. This makes it great for use in embedded projects.
Now, while the Pi Zero board does have a Mini HDMI port and Micro USB ports for power and peripheral devices, it is ideally used in a “headless” mode, with nothing connected to it except the power cable. All access to the module is via Secure Shell (SSH) from a remote terminal.
What follows is my step-by-step process for getting a Pi Zero up and running out of the box in headless mode, using a Linux (or Mac) computer as the remote terminal for communicating with and configuring the Pi.
Required Hardware
Here is the list of hardware I used to get started. Although you can buy everything “a la carte,” so to speak, it often makes sense to just buy a starter kit from a place like PiShop.us, Adafruit, SparkFun, and others which will include everything you’re likely to need. That’s what I did.
- Raspberry Pi Zero W ($10)
- 16GB Micro SD Card, Class 10 ($8)
- Micro-USB Power Supply, 5V 2.5A ($5)
- Pi Zero Case ($5–$15, optional)
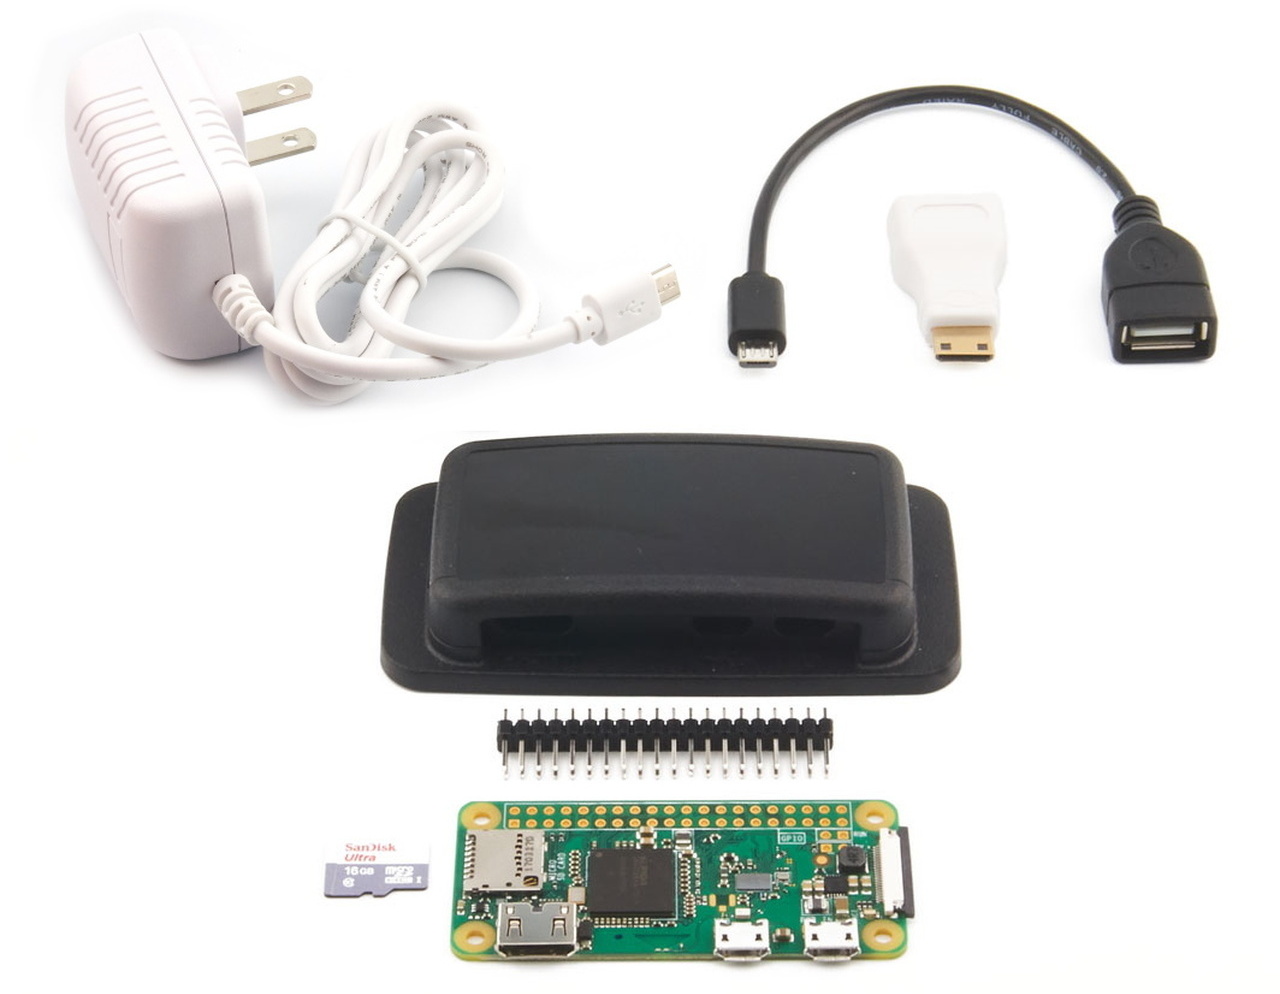 Pi Zero W Starter Kit (PiShop.us)
You’ll also need some type of SD card reader or hub attached to your computer in order to write the Raspbian OS to the SD card.
Install Raspbian Lite
Raspbian is a derivative of the Debian Linux distrubution, and is the standard operating system for all the Raspberry Pi boards. Since I’ll be using the Pi Zero in headless mode, accessing it only from a remote computer, there’s no need to install the complete desktop version. Raspbian Lite is a stripped-down version of the OS, and without the need for a graphical user interface, it’s less than half of the size of the desktop image.
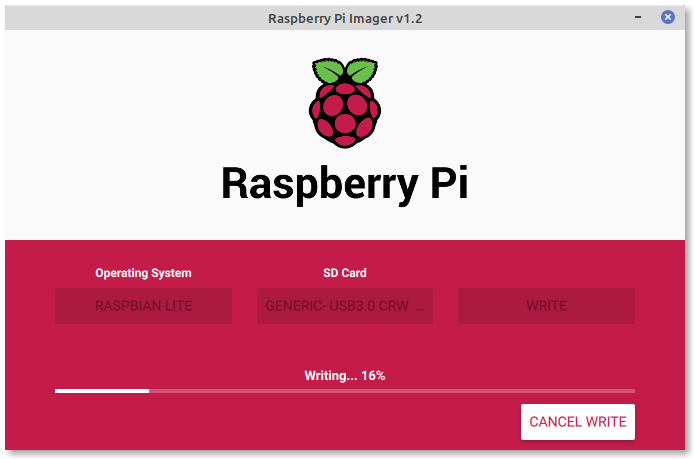
The excellent Raspberry Pi documenation contains a thorough description of the various methods of installing operating system images. These days, however, the simplest way to get Raspbian onto your SD card is to install the Raspberry Pi Imager program, available for Windows, MacOS, and Ubuntu.
Just insert your Micro SD card into your reader, launch the Raspberry Pi Imager, select your OS and SD card, and click WRITE. Then grab a coffee.
Operating System > Choose OS > Raspbian (other) > Raspbian Lite
We’ve got some configuring to do first. Since we want to be able to access the Pi Zero remotely, rather than plugging in a keyboard, we’ll need to set up the WiFi networking and a few other things prior to the first boot of the Pi Zero board. So leave the SD card inserted into your computer for now.
Raspbian Boot Configuration
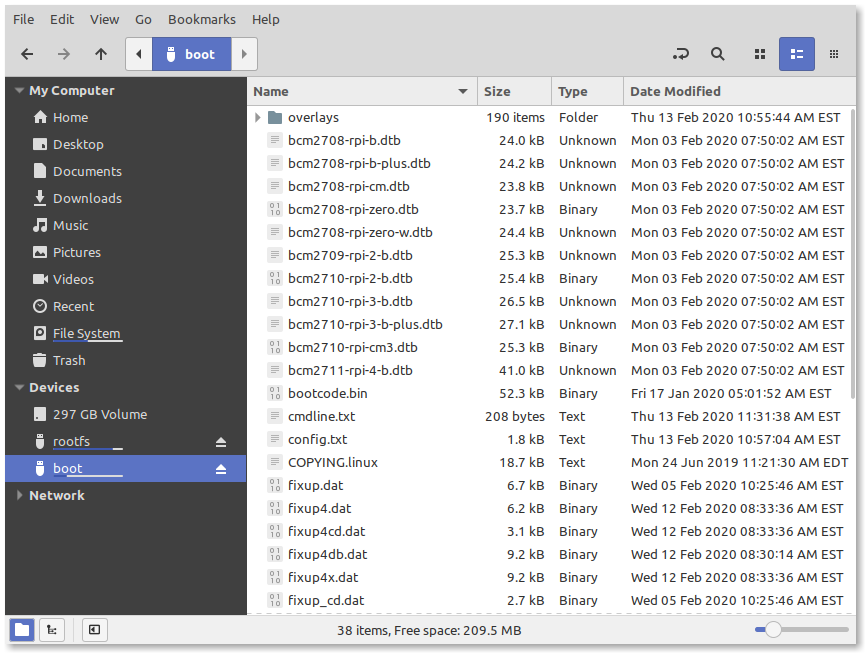
If the Raspian Lite OS image was successfully burned to the SD card, you should have gotten a “Write Successful” popup from the Raspberry Pi Imager program. In your file browser’s “Devices” menu, where previously you would have seen your blank SD card and other mounted drives, you should see two new devices named boot and rootfs. If you don’t see them, try removing and reinserting your SD card into your computer.
 New devices ‘boot’ and ‘rootfs’
We are only concerned with the /boot partition, so open up that directory in your file browser as in the image above. In the next sections, we are going to set up Raspbian for its first boot, by creating and/or editing the following three text files in the boot directory:
-
wpa_supplicant.conf- to configure WiFi -
ssh- to enable SSH for remote shell access -
config.txt- to enable UART for backup serial access
Go ahead and fire up your favorite text editor and let’s get started.
Configure WiFi
On startup, Raspbian looks in the boot directory for a file called wpa_supplicant.conf, if it exists, and uses that to configure its WiFi interface. This can be used to enable our headless setup without the need to plug in a keyboard and display. Using your text editor, go ahead and create that file in the SD card’s boot directory now, and paste in the following:
ctrl_interface=DIR=/var/run/wpa_supplicant GROUP=netdev
update_config=1
country=US

network={
    ssid="SSID"
    psk="PASSWORD"
    scan_ssid=1
}
Be sure to:
- Replace
USwith your two-letter country code if you’re in not the U.S. - Replace
SSIDwith the SSID name of your WiFi network. - Replace
PASSWORDwith the WPA2 password for your network.
That’s it! Save the file and close it.
Enable SSH
For security reasons, all recent Raspbian OS images have SSH disabled by default. Since we need this to be able to access the Pi Zero remotely, we’ll want to enable it on first boot.
In the boot directory, simply create an empty file named ssh. You can do this with your text editor, or from the command line by typing:
touch ssh
Enable UART
In case for some reason we can’t SSH in to the Pi when we first boot it up, we’ll want to enable UART on the GPIO header pins so we have a backup means of communicating with it. You’ll also need a USB to TTL Serial “Console” Cable to attach to the appropriate GPIO UART pins. If you bought one of the Pi Zero starter kits, you may also have the dongles to simply connect a keyboard and HDMI display. Either way, this step is just a backup.
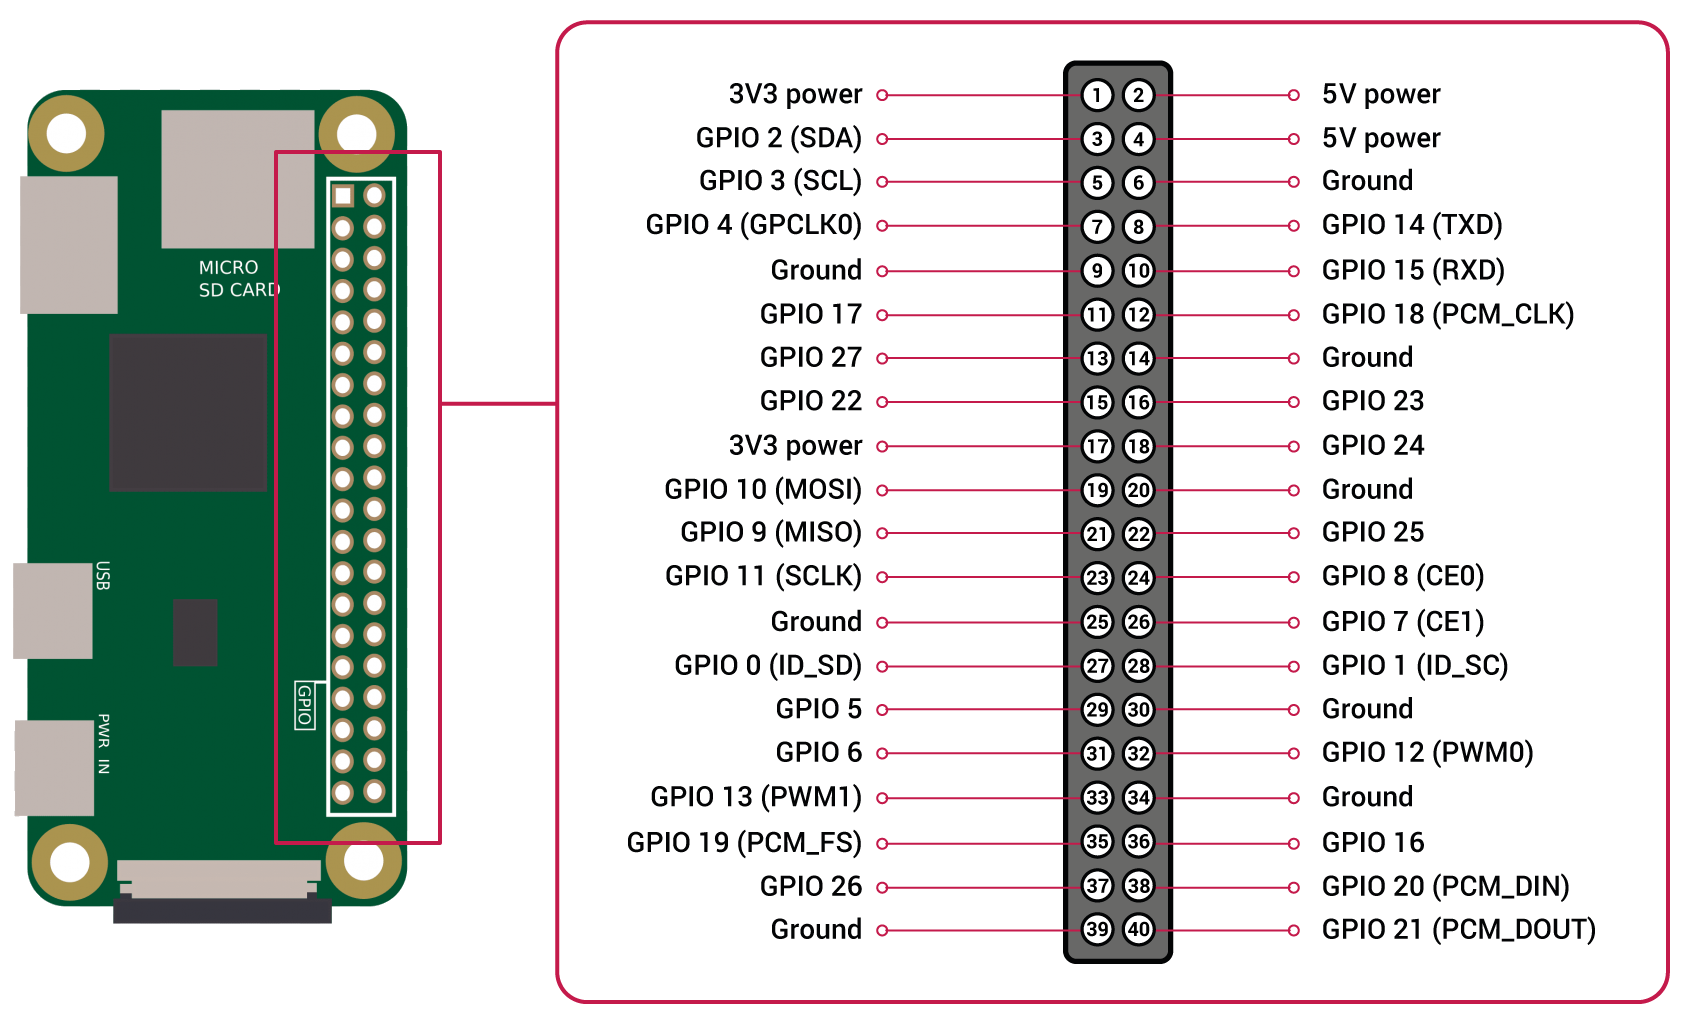 Pi Zero W GPIO diagram - UART is on GPIO 14 and 15 (pins 8 & 10)
Again in the boot directory, open the config.txt file in your text editor. This file should already exist, so we’ll just need to scroll to the end of the file and add the following text:
# Enable UART
enable_uart=1
Save the file and close it.
Preflight Check
Before removing the SD card from your computer, double check that you have the following highlighted files in your boot directory, and that they’ve been configured as discussed above.
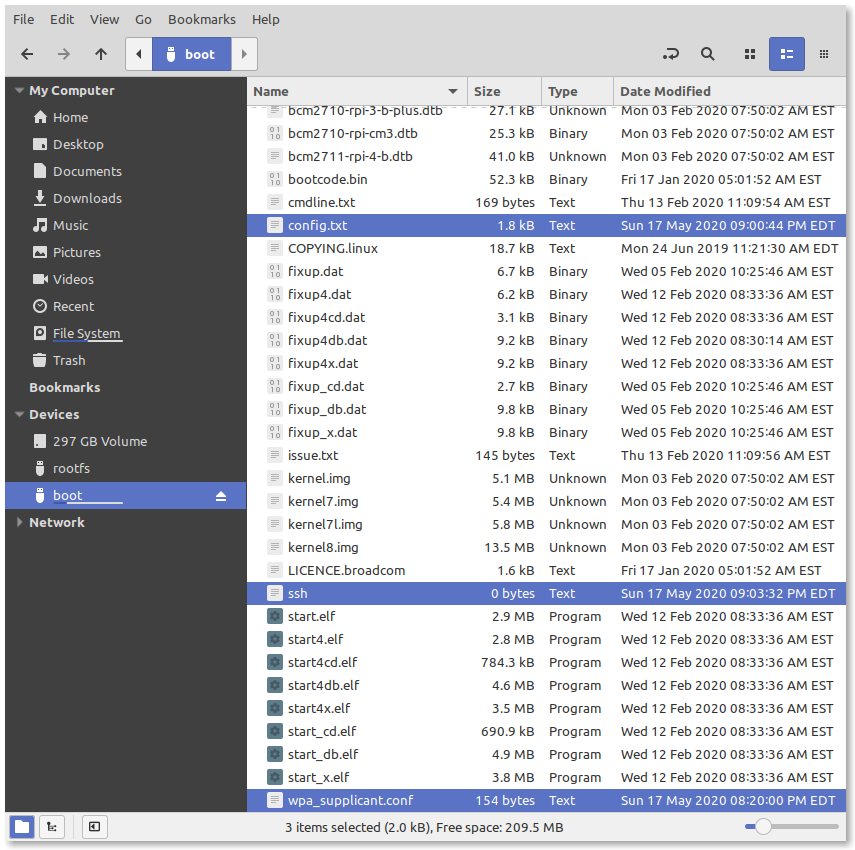 Required files in the ‘boot’ directory
Light It Up
At this point we’re ready to fire up the Pi. Safely eject the SD card from your computer and insert it into the slot on the Pi Zero. Plug the power adapter into a wall socket and insert the Micro USB male end into the PWR IN port as shown below.
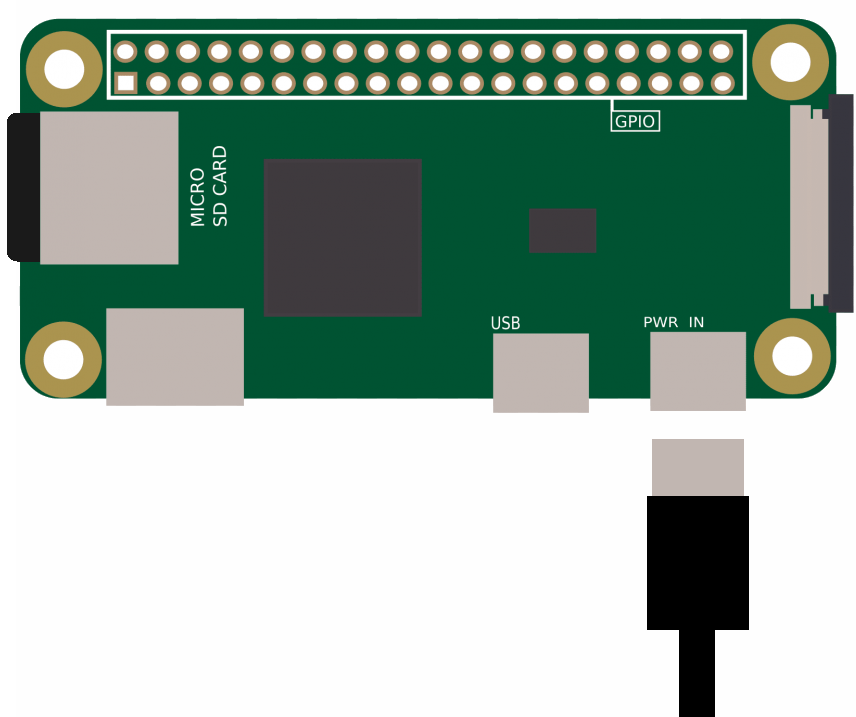 Raspberry Pi Zero ports, note the PWR IN on the right
There’s no power light on the Pi Zero, but the green LED should be flickering at this point, indicating that the device is booting up.
Communicate with the Pi Zero
Give the Pi a few minutes to finish booting, then try to ping the device and/or SSH into it. The default username is pi and the default password is raspberry.
ping -c 3 raspberrypi.local
ssh pi@raspberrypi.local
If these don’t work, you can also try to use the Pi’s LAN IP address instead of raspberrypi.local. You may need to use nmap or some similar utility to discover the devices on your local network. Failing that, it may be time to plug in a keyboard and monitor, or use the console cable to troubleshoot.
Housekeeping
Once you’re logged into the Pi for the first time, it’s a good idea to update the installed software prior to performing any other tasks.
sudo apt update
sudo apt upgrade
This could take quite a while on the first run, so it might be a good time to grab another beverage.
Initial Configuration
Once you’ve updated all the software, you should run:
sudo raspi-config
This will bring up the Raspberry Pi Software Configuration Tool, which will allow you to complete most of the configuration you’ll need to do before starting a project or installing other software.
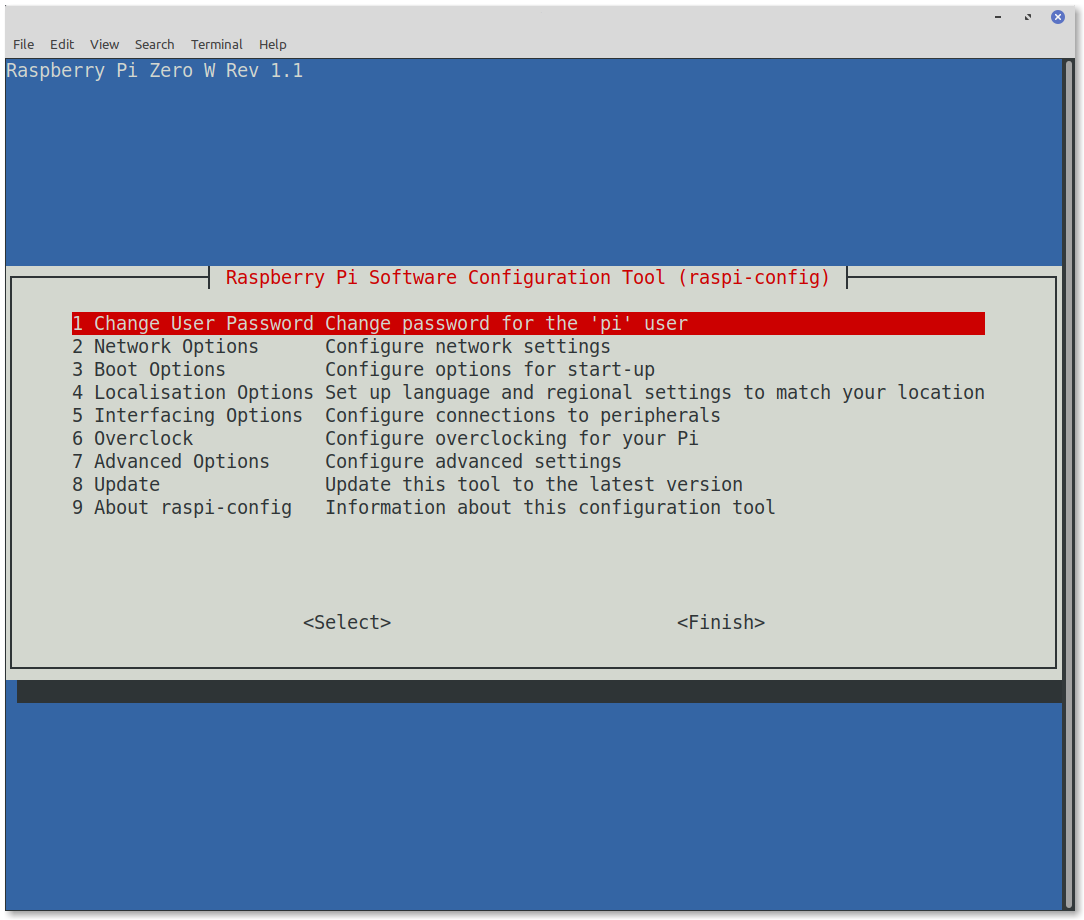 Raspberry Pi Software Configuration Tool
It’s usually a good idea to change the password, configure localization, and even change the hostname from raspberrypi to something unique, especially if you plan to have several devices running on the network.
Conclusion
I hope this article helps you get started using your Raspberry Pi Zero W. Check out the References section below to read more details about this setup process, and to get ideas about where to go next. Best of luck!
References
- Raspberry Pi Docs, Installing Operating System Images
- Raspberry Pi Docs, Setting up a Raspberry Pi Headless
- Raspberry Pi Docs, Remote Access
- Raspberry Pi Docs, The boot folder
- Raspberry Pi Docs, SSH (Secure Shell)
- Raspberry Pi Docs, config.txt
- Adafruit, Raspberry Pi Zero Headless Quick Start
 RV-8 Flight Performance Analysis